How to Harden Off Seedlings (Step-by-Step for Strong Transplants)
on Jan 30, 2026
This post may contain affiliate links. Please read our disclosure policy.
This 10-day guide shows you how to harden off seedlings so they survive the move from indoors to the garden. Starting plants from seed saves money. It only works if the plants live. Transplant shock wipes out those savings fast when you kill your seedlings. Hardening off seedlings is the final, essential step that protects your time, effort, and budget.
You’ve spent weeks tending seedlings under lights, watering carefully, and watching them grow—only to see them struggle or die after planting outside. That frustration is common. It’s totally avoidable. Follow these steps to harden off your seedlings successfully.

Table of Contents
What is Hardening Off and Why Is It Essential?
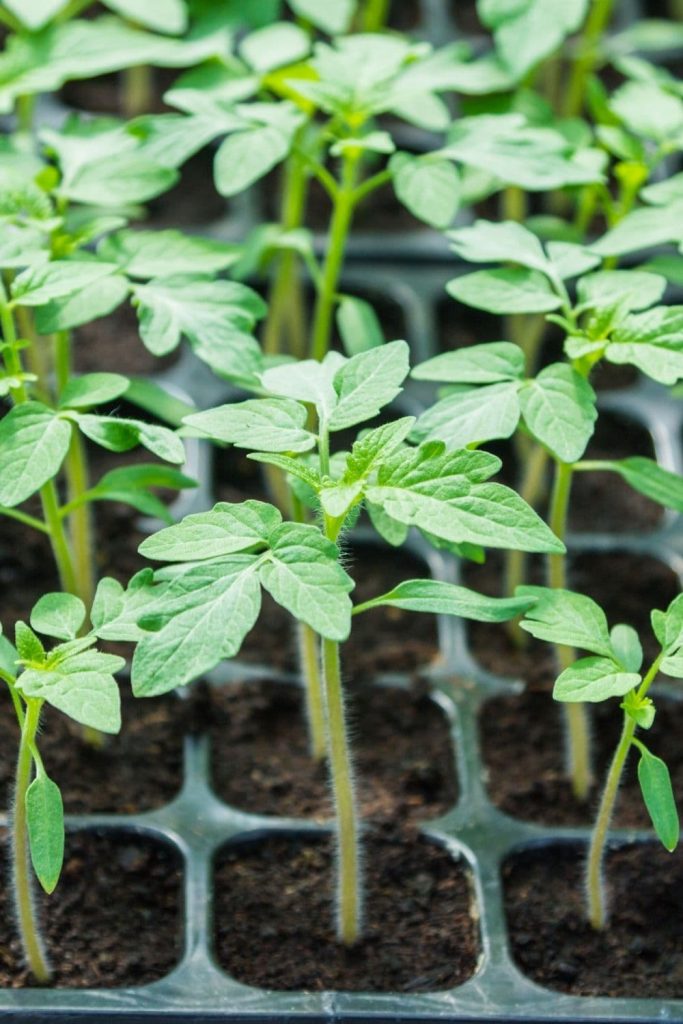
When you start your own seedlings inside, you must prepare them for life in the great outdoors – gently. This is called the hardening-off process. It allows your seedlings to gradually adjust to being in full sun and wind so they don’t suffer from transplant shock and die.
If you leave the seedlings indoors too long, they will get weak and leggy. It’s essential for their long-term plant growth to have exposure to outdoor conditions and varying temperature ranges.
Benefits of Proper Hardening Off
Proper hardening helps strengthen your seedlings’ cell walls, making them more resistant to outdoor elements like wind and rain. This gradual transition gives tender young plants time to develop a protective outer layer and stronger stems before facing the harsh realities of garden life.
What Happens if You Skip This Step
Without this crucial transition period, indoor-grown seedlings often die from shock when exposed suddenly to direct sunlight, wind, and fluctuating outdoor conditions. Their delicate systems simply can’t handle the immediate stress, resulting in wilted, burnt, or stunted plants.
When to Start Hardening Off Seedlings
The hardening-off process can take a full three weeks – so make sure to plan accordingly based on when you want to plant your seedlings in the garden.
Finding Your Frost-Free Date
In my Zone 5 garden with a frost-free date of May 15, I need to start the hardening off process by the last week of April if I intend to plant by the end of May. If I want to plant them earlier because the weather looks good, I will need to start the process even sooner.
Make sure you know your last frost date so you can plan! I recommend plugging your zip code into a frost-free calculator online. Your climate zone will determine the best time to begin this process.
Timing for Different Plant Types
Ultimately, frost tolerance, type of plant, and type of protection you have will determine when to plant. Using a tunnel, a cold frame, a small, unheated greenhouse or a walk-in greenhouse will help you get a jump start on your garden, enabling you to enjoy home-grown food sooner!

Complete 10-Day Hardening Off Schedule
It’s important to give your seedlings time to adjust. Don’t rush it. Here is a step-by-step plan to harden off plants in 10 days, based on my personal experience as a long time gardener.
Days 1-3: Starting Slowly
- Place seedlings outdoors in a sheltered position with partial shade for 1-2 hours
- Gradually increase exposure by spending less time indoors each day
- Choose the warmest part of the day for this initial exposure
- Monitor for signs of stress and bring plants in if they appear wilted
Days 4-5: Increasing Exposure
- Check seedlings for any signs of stress (wilting, yellowing)
- If they look healthy, increase exposure to filtered light levels for 3-4 hours
- Continue to protect from strong winds and harsh direct sunlight
- Bring them back indoors for the nighttime temperatures
Days 6-7: Introducing Direct Sunlight
- Place seedlings in a spot with morning sun for 4-5 hours
- Ensure they are protected from strong winds
- Gradually expose to midday sun for increasing length of time
- Water as needed, but only from the bottom to avoid leaf burn
Days 8-9: Wind Exposure and Extended Time
- Extend exposure to afternoon sunlight for 6-7 hours
- Place seedlings in a spot with gentle, indirect wind for 1-2 hours
- Wind helps strengthen stems, preparing them for their new environment
- Continue monitoring the weather forecast for any unexpected conditions
Pin this now to find it later
Pin ItDay 10 & Planting Day: Final Steps
- Allow seedlings to spend the entire day outdoors
- Ensure they have protection from harsh midday sun using shade cloth if necessary
- Bring seedlings indoors one final night to protect from low temperatures
Planting Day:
- Plant seedlings in the garden in the morning or late afternoon on a warm day
- Water gently after planting to settle soil around roots
- Continue to monitor young seedlings for any signs of stress
- Use row covers if there’s danger of frost or extreme weather
This schedule helps seedlings adjust gradually, reducing the risk of transplant shock and ensuring they thrive in their new outdoor environment.

Hardening Off by Plant Type
Different types of plants require different approaches to the hardening off process.

Cold-Hardy Plants (Kale, Lettuce, Spinach)
Very cold-hardy plants like kale, lettuce, peas, and spinach can be set out about 6 weeks before the last frost date. They handle cold temperatures better than any other plants, so they are very good to practice with.
With these plants, even if you forget and leave them outside one night, you can start over pretty quickly. They’re quite forgiving for beginners still learning gardening techniques.
Frost-Tolerant Plants (Broccoli, Cabbage, Onions)
Frost-tolerant plants can be set out 2-3 weeks before your last frost date. Plants like broccoli, brussels sprouts, cabbage, cauliflower, onions from seed, and parsnips can handle a light frost, but even then, it will stunt the future fruits dramatically.
A lot of people don’t know this, but corn can also tolerate a light frost as long as they aren’t very tall. If you watch the weather closely and don’t anticipate a cold snap, you can plant your corn seeds directly into the ground two weeks BEFORE your last frost date.

Warm-Weather Plants (Tomatoes, Peppers, Squash)
However, tender plants like peppers and tomatoes will be killed by frost, so do not set them out until a week or two AFTER the last frost date.
Warm plants like beans, cucumbers, eggplant, herbs, melons, peppers, pumpkins, and squashes all need the soil to be 70°F for a good week before planting. Check when your soil will be warm enough and start one to two weeks before hardening them off.
The frost will kill warm-loving plants. Do not start hardening them off unless you have been successful with the very hardy and frost-tolerant plants. Warm plants take longer to grow. Practice on quick growers in the very hardy list for the best results.


Troubleshooting Hardening Off Problems
Even with careful planning, problems can arise during the hardening-off process. Here’s how to identify and solve common issues.
Wilting Seedlings: Causes and Solutions
Being left outside too long can cause your plants to wilt even if it is cloudy or they are under shade. The wind can be too harsh and dry them out or even break them, so watch on windy days.
If you notice your baby plants wilting, go ahead and bring them back inside. This is their way of telling you they didn’t like something. Adjust their exposure time on the next day and gradually build up their tolerance again.
Leaf Discoloration and Sunburn
Tender seedlings can become sunburnt even if they were grown under LED grow lights. The sun is simply brighter than any grow light. Set an alarm clock to remind you to take them in.
Another way to prevent sunburn in the hardening off process is to keep your seedlings in a shaded area. Don’t expose them to direct sunlight until the very end of the process, and even then, start with early morning or late afternoon sun rather than midday exposure.
White spots on leaves often indicate sunburn. If this occurs, provide more shade and reduce exposure time until the plants adjust to higher light levels.
Protecting Seedlings from Wildlife
Rabbits, deer, cats, and dogs can actually eat your plants, so put up a fence or set them in a safe space. Consider bringing decorative plant stands or outdoor decor to protect your seedlings while they’re temporarily outside during the hardening process.
Watering and Fertilizing During Hardening Off
Only water your seedlings from the bottom and do it the night before sitting them out. Water droplets act like a magnifying glass to the sun and can burn the leaves. Don’t mist or water your seedlings overhead during the hardening off process.
Do not fertilize your seedlings during this time as you want to help them learn to cope a bit on their own. I do use a lite compost tea when I bring them in to help with the stress of hardening off if they ever look wilted.

Final Tips for Successful Transplanting
How Do I Know if My Seedlings are Ready to be Hardened Off?
Seedlings are ready to be hardened off when they have sturdy stems and several sets of true leaves. This is typically about 2-3 weeks before your planned transplant date, depending on the type of plant.
Using Protection for Extended Seasons
For the third week of the process, begin leaving seedlings out at night with a frost blanket or in an unheated greenhouse or cold frame. Plant them out after that. You can plant cold-hardy plants directly in the garden after 2 weeks, just make sure to cover them nightly and remove the cover each morning.
Do not close them up in enclosed plastic containers. Your plants can cook. Always give venting space. You can use milk jugs for wind protection if needed, but take off the cap so the plants can breathe.
The Most Important Thing to Remember
Everything can go right so take a chance and try it. Every gardener kills their plants while hardening off seedlings at some point. Life and weather happens. Just buy a few extra packs of seed, divide your plants in half, and start one half later or buy backup seedlings.
If anyone asks, tell them you are succession planting for an extended harvest. The best way to learn is through practice, and every garden season brings new knowledge.
Remember that the hardening-off process is the best way to ensure your carefully grown seedlings transition successfully to your garden. With patience and these techniques, you’ll enjoy a bountiful harvest from your healthy, resilient plants.

Let us know if you have ANY questions about the hardening off process and good luck!


