How to Start Seeds Indoors: A Simple Step-by-Step Guide
on Feb 08, 2026
This post may contain affiliate links. Please read our disclosure policy.
Starting seeds indoors is one of the most exciting times of the gardening season. There’s something magical about watching tiny seeds transform into strong seedlings ready for the garden. Plus, it’s way cheaper than buying seedlings from the nursery!
But here’s the thing: seed starting can feel overwhelming if you’re new to it. I remember my first year – I had leggy seedlings, fungus gnats, and more dead plants than I’d like to admit.
If you’re ready to grow your own seedlings from scratch, this guide will walk you through exactly how to start seeds indoors – from prep to transplant. I’ve also linked to my other articles on seed starting supplies and common seed starting mistakes so you can get all the details you need.
If you’d like to try to start your own vegetable and flower seeds indoors, here’s what you have to know: what supplies to have on hand, tips for best success, and mistakes to avoid.
Table of Contents
- When to Start Seeds Indoors
- Gather Your Seed Starting Supplies
- Prepare Your Seed Starting Mix
- Fill Your Containers
- Plant Your Seeds
- Create a Mini Greenhouse Environment
- Turn on the Lights (and Keep Them Close)
- Water Correctly
- Fertilize Lightly
- Thin Your Seedlings
- Pot Up if Needed
- Harden Off Your Seedlings
- Transplant to the Garden
- Final Thoughts
- If you liked this post on starting seedlings, you might like these too:

When to Start Seeds Indoors
Timing is everything when it comes to seed starting. Start too early and your seedlings get leggy and root-bound before it’s time to plant. Start too late and you’ll miss your planting window.
Most seed packets tell you when to start seeds based on your last frost date. If you don’t know yours, check it by zip code at Dave’s Garden.
Here’s a general guideline:
- Slow growers like peppers, eggplants, and celery: 8-10 weeks before last frost
- Tomatoes: 6-8 weeks before last frost
- Brassicas (broccoli, cabbage, kale): 5-6 weeks before last frost
- Fast growers like cucumbers, squash, and melons: 3-4 weeks before last frost
For more detail on timing, read my post on when to start seeds indoors.
Pin this now to find it later
Pin ItGather Your Seed Starting Supplies
Before you start planting, make sure you have everything you need. The essentials include:
- High-quality seeds
- Seed starting mix (not regular potting soil)
- Containers with drainage holes
- Grow lights or a very sunny window
- Plant labels – wooden craft sticks are cheap and compostable (trust me, you’ll forget which is which)
- A spray bottle or watering can with a gentle spout – this spray bottle is amazing for seedlings!
You can also use heat mats to help with germination if your space is cool. For a complete breakdown of what you need and what you can skip, check out my article on the best seed starting supplies.

Prepare Your Seed Starting Mix
Here’s a mistake I made early on: I used regular garden soil to start my seeds. Big mistake. Garden soil is too heavy for delicate seedlings and can harbor diseases.
Instead, use a light, fluffy seed starting mix. You can buy a bag at the store or make your own by mixing equal parts:
- All purpose potting soil (organic, no synthetic fertilizers)
- Perlite (for drainage)
- Compost (for nutrients)
- Worm Castings (the secret ingredient for strong seedlings)
Before you fill your pots, wet the mix thoroughly. Dry seed starting mix repels water, so it’s much easier to moisten it before planting.
Learn how to get started worm composting to make your own worm castings!

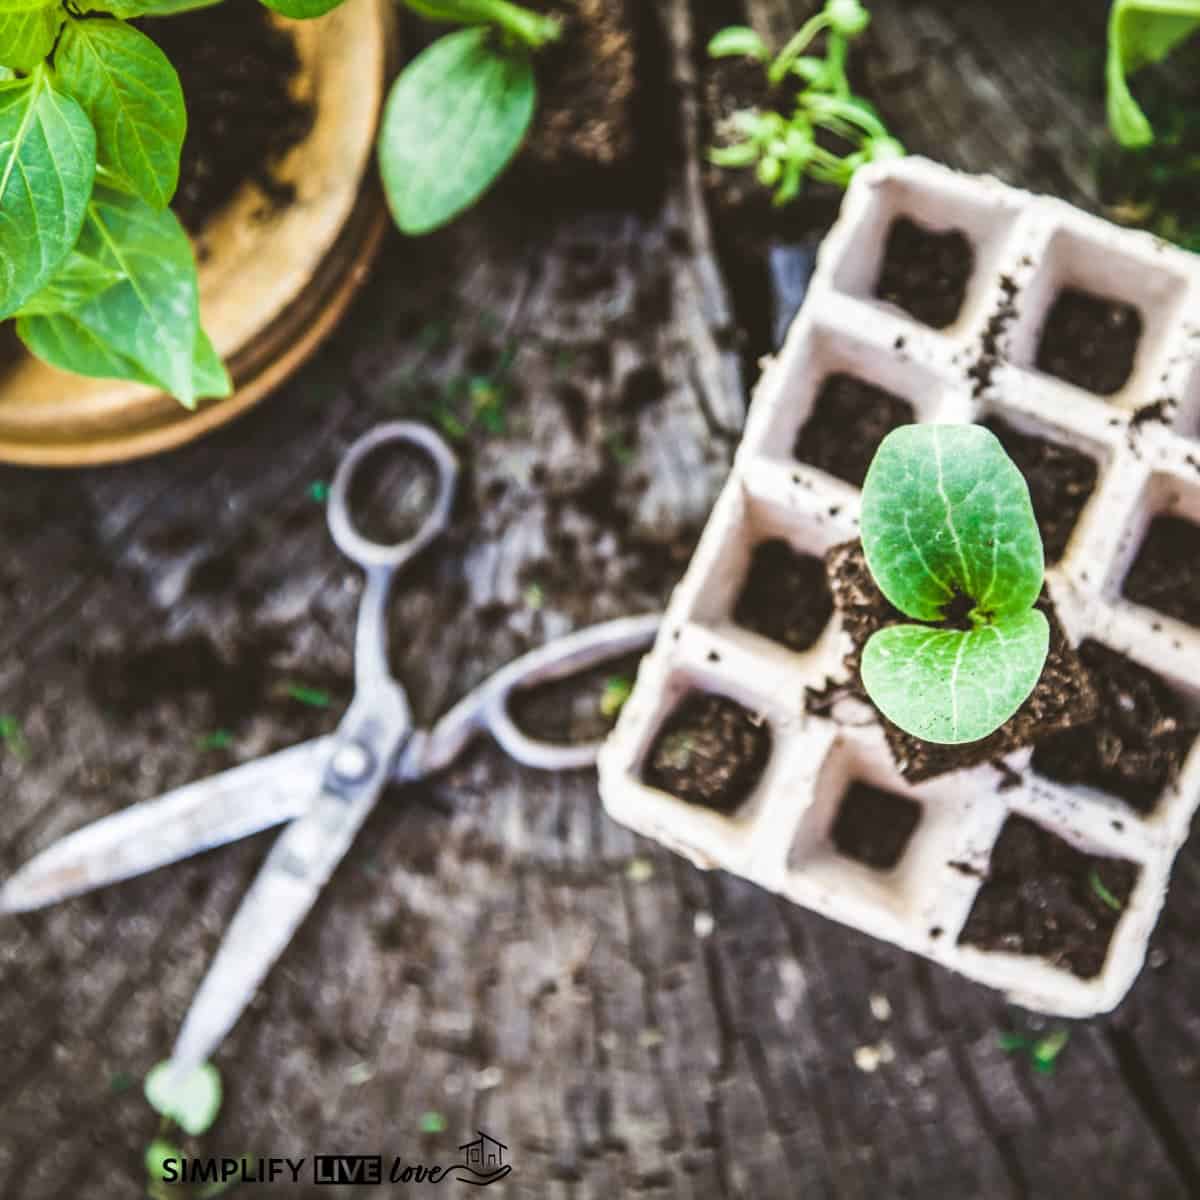
Fill Your Containers
Fill your seed starting containers with the moistened seed starting mix. Don’t pack it down – you want it light and fluffy so roots can grow easily.
You can use anything from fancy seed starting trays to toilet paper rolls and egg cartons. Just make sure whatever you use has drainage holes at the bottom.
Plant Your Seeds
Now for the fun part! Plant one or two seeds per pot. If both germinate, you can thin to the strongest one later.
Check the seed packet for planting depth. A good rule of thumb is to plant seeds at a depth about twice their size. Tiny seeds like lettuce or basil can just be pressed onto the surface.
After planting, gently cover with a thin layer of seed starting mix and mist with water.

Label Everything (Seriously)
I cannot stress this enough: label your seeds as soon as you plant them. All tomato seedlings look the same. Trust me, I learned this the hard way when I ended up with 25 cherry tomato plants and only three good slicers one year. 😀
Use plant labels, popsicle sticks, or even masking tape. Just write down what you planted and the date.

Create a Mini Greenhouse Environment
Seeds need consistent moisture and warmth to germinate. Cover your containers with a plastic dome, plastic wrap, or even a clear plastic bag to create a humid environment.
Place your containers in a warm spot. Most seeds germinate best between 65-75°F. If your space is cooler, a heat mat can help speed things up.
Check your seeds daily. Once you see sprouts, remove the cover immediately – they need air circulation to stay healthy.

Turn on the Lights (and Keep Them Close)
Once your seedlings pop up, they need light – and lots of it. Even a sunny south-facing window usually isn’t enough to prevent leggy seedlings.
Set up grow lights and keep them 2-3 inches above your seedlings. As the plants grow, raise the lights to maintain that distance. I use a timer to keep my lights on for 14-16 hours a day.

Water Correctly
Watering seedlings is a delicate balance. Too much water and they’ll rot. Too little and they’ll dry out and die.
Keep the soil consistently moist but not soggy. I use a spray bottle for the first week or two because it’s gentler on tiny seedlings. Once they’re a bit bigger, you can water from the bottom by placing your containers in a tray of water and letting them soak it up.
You may need to water once or twice a day, depending on how warm and dry your space is.

Fertilize Lightly
Once your seedlings develop their first set of true leaves (the ones that look like the mature plant, not the initial seed leaves), you can start fertilizing lightly.
I use a diluted organic liquid fertilizer like Fox Farm or fish emulsion once a week. Don’t overdo it – too much fertilizer can burn delicate roots.

Thin Your Seedlings
If both seeds in a pot germinated, you’ll need to thin them. It feels brutal, but keeping both will result in weak, crowded plants.
Choose the strongest, healthiest-looking seedling and snip the other at the soil line with scissors. Don’t pull it out – you might damage the roots of the one you’re keeping.
Pot Up if Needed
If you started your seeds in small containers like egg cartons or toilet paper rolls, you’ll need to transplant them into larger pots once they outgrow their space.
Look for signs like roots poking out the drainage holes or seedlings that seem top-heavy. When you pot up, use regular potting mix (not seed starting mix) and give them a bit more room to grow.
Harden Off Your Seedlings
This is the step that makes or breaks your seedlings. Don’t skip it.
About a week or two before you plan to transplant, start acclimating your seedlings to outdoor conditions. This process is called hardening off.
Start by placing your seedlings outside in a shaded, protected spot for an hour or two. Each day, gradually increase their time outside and their exposure to sun and wind.
By the end of the week, they should be able to stay outside all day and night (weather permitting). For more details, read my post on how to harden off seedlings.
Transplant to the Garden
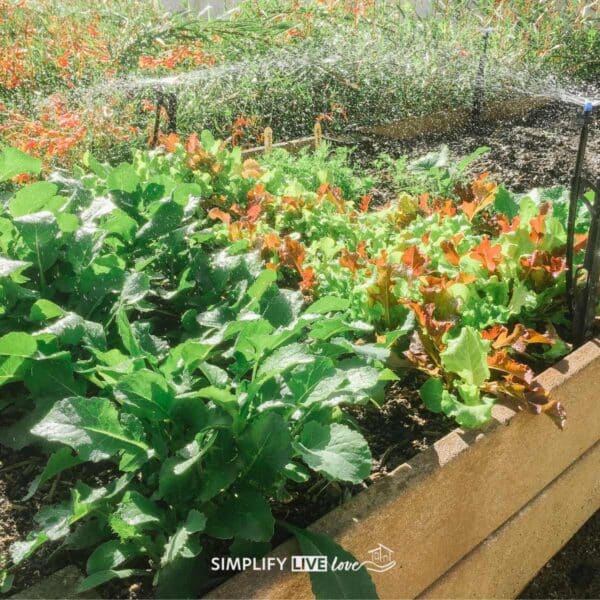
Once your seedlings are hardened off and the danger of frost has passed (for warm-weather crops), it’s time to transplant them into your garden.
Plant on a cloudy day or in the evening to minimize transplant shock. Water well after planting and keep an eye on them for the first few days.
If you started brassicas (broccoli, cabbage, kale), you can plant them outside several weeks before the last frost as long as the soil is workable.
Final Thoughts
Starting seeds indoors takes a bit of practice, but once you get the hang of it, it’s incredibly rewarding. You’ll save money, have access to more plant varieties, and get to watch your garden grow from the very beginning.
If you’re still feeling overwhelmed, don’t worry. Start with just a few easy crops like tomatoes or basil. Learn what works in your space and build from there.
For more help, check out my articles on seed starting supplies and common seed starting mistakes.
What’s been your biggest challenge with seed starting? Let me know in the comments!
If you liked this post on starting seedlings, you might like these too:
Get a Jump Start on Gardening with Winter Sowing
When to Start Seedlings Indoors in the Zone 5 Garden
Learn How to Store Seeds + 15 Creative Seed Storage Ideas