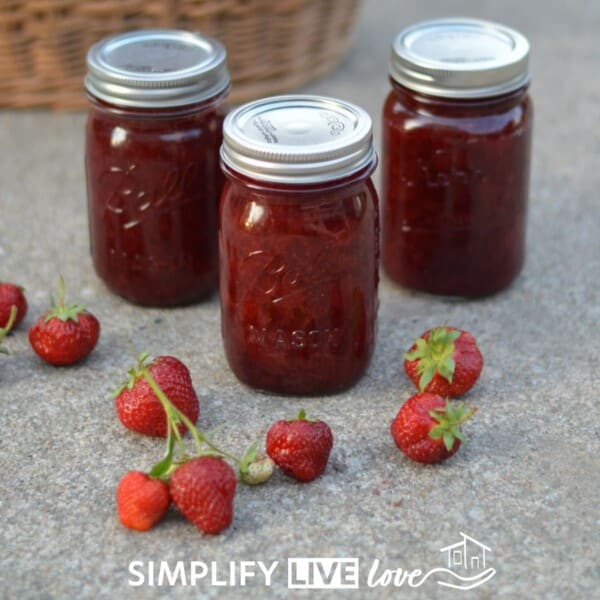
Homemade Freshness in Every Jar: Can Crushed Tomatoes
on Sep 13, 2024, Updated Feb 02, 2025
This post may contain affiliate links. Please read our disclosure policy.
If you’d like to learn how to can crushed tomatoes quickly and easily, this step by step tutorial is for you! Canning doesn’t have to take forever. Learn how to can crushed tomatoes in record time. No blanching or de-seeding required!
In past years, I have had tomatoes coming out of my ears and have to find an easy way to can the bounty from my garden. I love canning crushed tomatoes primarily for Taco Soup, but these tomatoes are also a great base for all kinds of sauces. Taco Soup is one of my go-to recipes for busy fall nights. Canning crushed tomatoes can be such a pain in the butt, though.
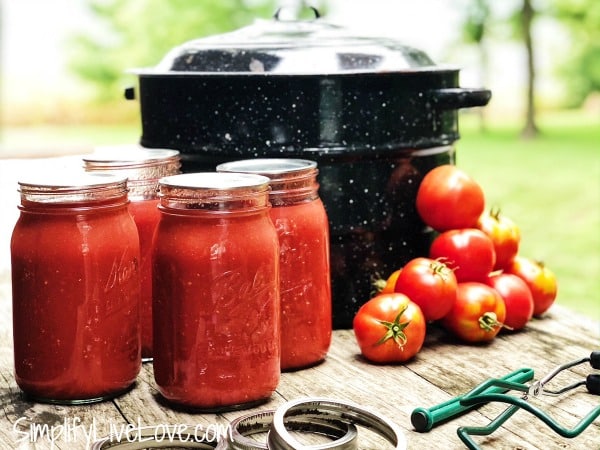
Table of Contents
- How to Can Crushed Tomatoes Quickly!
- What equipment do I need for canning my own crushed tomatoes?
- Do I need to peel tomatoes before canning them?
- What’s the Difference Between Crushed Tomatoes and Tomato Sauce?
- Crushed Tomatoes Recipes
- The Lazy Person’s Guide to Canning Crushed Tomatoes Recipe
- More Homemade Canning Recipes:
How to Can Crushed Tomatoes Quickly!
When I first started canning tomatoes, it was a long and drawn out process. First, I washed all the tomatoes and cut off the blossom end and stem end. Then I blanched the tomatoes in boiling water and removed the skin. Then I removed the seeds (and half the tomato) and boiled what was left. And finally, I canned the crushed tomatoes in my water-bath canner. I thought I was supposed to do all of this because I was directed to in the Blue Book Guide to Preserving. Does the process sound familiar to you?
Since I’m short on time, I developed a new procedure for canning crushed tomatoes: a process that takes about half the time and is a heck of a lot easier. Here’s how you can cut your tomato processing time in half too!
Prepare Your Crushed Tomatoes
First, wash the tomatoes and cut off the bad spots.

Then, skip two of the most time consuming steps – blanching and removing seeds. Instead, just put the tomatoes in the food processor and puree them – skin, seeds, and all! It yields a lot more this way because half the tomato is not thrown out.

I have to tell you, I LOVE my mother’s Braun Food Processor! It’s awesome because there’s no hole in that pitcher. I also really like pureeing crushed tomatoes in my vitamix.

Next, bring the tomatoes to boil over medium-high heat. Then reduce heat and simmer for 20 minutes, or up to 2-3 hours depending on the time you have available. If you use the shorter time, keep the temperature higher and stir more often.
Prepare the Water Bath Canner
When your crushed tomatoes are about ready, prepare the water bath canner. You’ll also need to sterilize your clean quart jars or pint jars by either boiling them in the canner for 10 minutes or running them through a hot cycle in the dishwasher. I generally run mine through the dishwasher so they’ll come out nice and hot about the time I need to fill them.
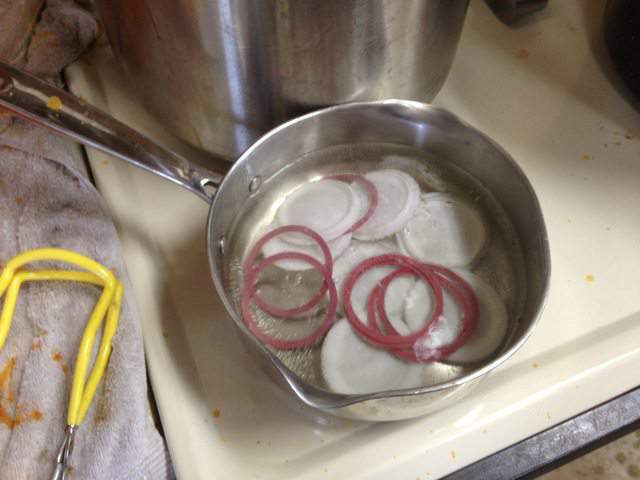
Prepare your canning lids by submersing them in steaming, but not boiling, water for a few minutes. I use both BPA free Tattler Reusable Canning Lids and the normal Ball Canning Lids
which are now also supposed to be BPA Free!! YAY!! You used to have to boil them gently, but you don’t anymore. Simply heat them in the hot water and you’re good to go.

Fill up your jars with the hot tomatoes – you want at least 1/4-inch headroom left AFTER you add 2 TBS lemon juice concentrate (VERY IMPORTANT STEP!!) per jar, wipe the lid to remove any food — you want your jars to seal, after all. As you finish each jar, place it in the water bath canner to keep it hot. It is recommended that you completely finish one jar at a time for optimal results – not the batch method I display here… Do as I say, not as I do. 🙂
Pin this now to find it later
Pin It
NOTE: Four tablespoons of a 5 percent acidity vinegar per quart may be used instead of bottled lemon juice or citric acid. It’s possible the vinegar may cause undesirable flavor changes, but I’ve never personally noticed anything. I prefer to use vinegar instead of lemon juice.
Put your lids on and tighten rings securely. Once your canner is full, make sure the water covers the tops of the jars, adding more water if necessary and bring to a boil. When the water has reached a rolling boil, start the timer for 45 minutes. Add 5 minutes per 1,000 feet to compensate for your altitude. I live at just under 1,000 feet. If you live at 2,000 feet, process for 50 minutes instead. And so on. If you don’t know your altitude, just google it.
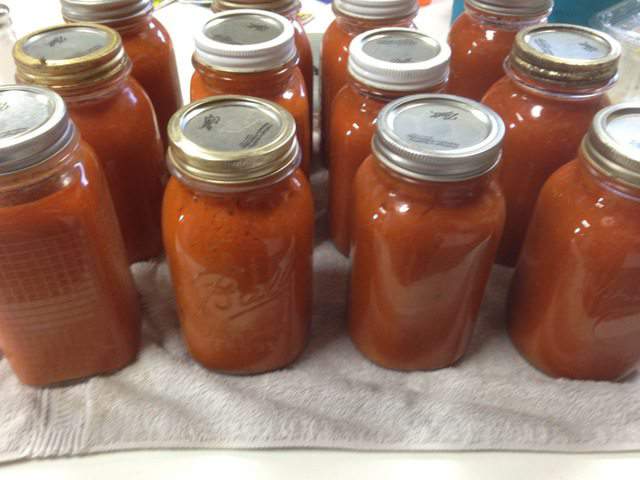
Carefully remove the jars and put them on a clean towel. Let them cool for a full 24 hours before you move them. Sit back and listen to the wonderful pings of the sealing jars! After 24 hours, make sure all of your jars have sealed. Wipe them down, remove the rings, and put them on a shelf to admire. If any jars didn’t seal, heat the sauce back up and try again.
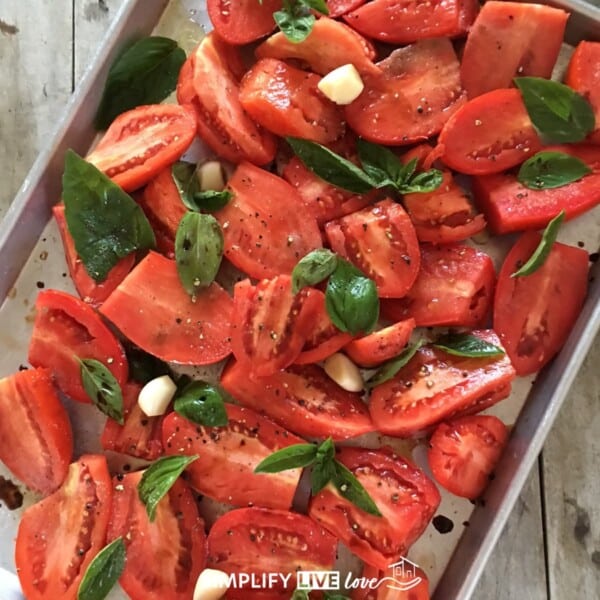
In my experience, Romas, San Marzanos, and Amish paste tomatoes produce the best stewed tomatoes because they are less watery than other varieties. Regardless, fresh tomatoes canned at home will always be better than store bought versions.
What equipment do I need for canning my own crushed tomatoes?
You’ll need jars, lids, rings, a water bath canner, a jar lifter, and a canning funnel.
Do I need to peel tomatoes before canning them?
Peeling gives a smoother texture to crushed tomatoes, but it isn’t mandatory. Blanch tomatoes first to make peeling easier. I save time by not peeling mine.

What’s the Difference Between Crushed Tomatoes and Tomato Sauce?
In a pinch, I have used crushed tomatoes and tomato sauce interchangeably, but there is a difference.
Crushed tomatoes and tomato sauce are two distinct tomato products. Crushed tomatoes consist of peeled and crushed whole tomatoes. They are often canned and have a chunky texture with visible pieces of tomato. The flavor is generally fresher and has more of a tomato-y flavor. Use crushed tomatoes as a base for pasta sauces, soups, and stews.
Tomato sauce is smoother and cooked down to a thicker consistency. Sometimes it is seasoned with herbs, spices, or even diced vegetables. Use tomato sauce straight out of the jar for pasta, pizza, and lasagnas.
Crushed tomatoes and tomato sauce have their own qualities. Choose which one to use based on your texture, consistency, and flavor preferences.
Crushed Tomatoes Recipes
Crushed tomatoes are the perfect addition to pasta sauces, soups, and stews because of their fresh flavor and chunky texture. They add depth of flavor as well as improved taste and texture.
Use crushed tomatoes to create a comforting chili, a flavorful curry, or even a homemade pizza sauce. Crushed tomatoes are a kitchen staple, especially when you’ve canned them yourself.
The Lazy Person’s Guide to Canning Crushed Tomatoes
Ingredients
- 45 lbs of tomatoes
- 2 TBS Bottled lemon juice
- OR 4 TBS 5% acidity vinegar – per quart jar
Instructions
- Wash tomatoes and remove core and blossom ends, plus any bad spots.
- Fill a food processor or blender with tomatoes and puree tomatoes, skin, seeds, and all.
- Pour tomatoes in a large pot and bring to biol over medium-high heat.
- Decrease heat to low, and simmer sauce 20 minutes, or as long as 2-3 hours, stirring occasionally to prevent sticking.
- Sterilize 7 quart jars or 14 pint jars and bring water to boil in the water-bath canner.
- Heat rings and lids in warm water.
- Ladle tomatoes into jars leaving 1/2" head space and add 2 TBS lemon juice or 4 TBS vinegar to each quart jar.
- Slide a nonmetallic spatula around the inside of the jar to release air bubbles.
- Wipe rim and threads of jar, then remove the lid and ring from the hot water and screw lid on jar.
- As you fill each jar, place it in the canner. The water should be simmering in the canner.
- After all the jars are filled, lower them into the canner. The water must cover the jars by 1-2" so add water if needed.
- Put the lid on the canner and bring the water back to biol. Once it's boiling, start the timer.
- Process pints for 40 minutes and quarts for 45 minutes.
- When the time is up, turn off the burner and remove lid. Let the canner cool for five minutes before removing jars.
- Remove the jars from the canner and set them upright, 1-2" a part on a dry towel. Let them cool for 12 to 24 hours.
- After the jars have cooled, check the lids for seals by pressing down on the center of the lid. The lid should be pressed down and should not flex. If that's the case, take the ring off, and gently try to take off the lid. If it doesn't come off, you have a good seal!
- Wipe the lid and jar, label, and store jars in a cool, dry, dark place.


I just cut the end out and then cut them in half and put them in a huge pot and cook away. Slowly the skin comes off most of them and I just pick them out of the pot. I don’t get all crazy about this because after I add some spices and let it cook for about an hour and a half or so I use my immersion blender and mix it all up. The first time I made tomato sauce I squeezed out the seeds but I realized that was a huge waste! I love that you mix it up first.
I have been doing lots of crushed tomatoes and some sauce, both regular sauce and spaghetti sauce. I usually do salsa but I still have some left from last year so I haven’t gotten to it yet. Hopefully, I will get some done in the next few weeks because I have several recipes that call for some in it and I don’t really like to make fresh for the recipes.
The heat earlier in the summer, really did a number on my tomatoes, so after one round, I have had to buy them at the farmer’s market.
My kitchen would simply get too hot doing all that canning now so I freeze my tomato bounty.
Simple slow cooker sauce:
1 onion
2-3 garlic cloves
2 peel carrots
stem-end removed tomatoes cut in quarters to fill a large crockpot
olive oil poured over the veggies (.25 cup?)
Cook on low until your husband says “What is that wonderful smell?” (8 hours or so) and then remove the cover to cover for another hour or two. Cool, puree with an immersion blender and freeze.
Yum! I have frozen sauce before too. I do that in smaller quantities – usually from sauce I make with my crushed tomatoes. Thanks for sharing your recipe. It looks great and the carrots add sweetness without sugar! 🙂
How long will they keep in the freezer?
I have done the same too! I have a Vita Mix, so it really blends them up well. The last few years I haven’t been able to grow nearly as many tomatoes, so I have canned them whole, (skins off) so I can use them for whatever we need. They seem to taste fresher that way. I may just can some with the skins on and then puree them in my Vita Mix before cooking. That would be a time saver as well. Good post! It’s great to see so many people canning! 🙂
I don’t blanch my tomatoes either, though I do squeeze the seeds out. Usually, I collect them in gallon bags in the freezer and then can 5 gallon bags at a time.
Okay if you are truly lazy you will buy a stick blender aka immersion blender and then you won’t even have to do batches in the food processor, you can just do it all in one pot! That’s what I do! However, then I add the step of running it through the food mill to get out any seeds and skin. Although now you are making me question whether I should bother doing that…
Foy
Well, I guess the truly lazy person will just buy Ragu… 😉 I don’t have an immersion blender but if I did, I would try it that way! I don’t mind the seeds and the skin gets shredded when I run my tomatoes in the food processor! So if the immersion blender does as good a job as the food processor, I probably wouldn’t run it through my food mill. Win-win!
Looks great!
I like to take off the skins… though it does take time. Tomato skin holds elements that can aggravate arthritis…. plus they end up stuck in my teeth somehow, even after pureeing. 😉
To save even MORE time: buy an immersion blender! you wn’t have to dirty a separate device and you can combine the pureeing and boiling to the same step. Ah, look like Foy beat me to that recommendation. You can get an immersion blender pretty cheaply, and you’ll wonder how you ever lived and made soup, mashed potatoes or sauce without one!
Thanks for linking up to the hop!
I do mine just like you only I use one of those high powered blender, similar to the Vitamix. It makes doing tomatoes a snap. Sometimes we puree a little celery also, add a dash of S&P, to make tomato juice and of course the lemon juice in the bottom of the jar to be sure it is acidic enough for the water bath canner. Don’t let the tomato puree and celery puree boil, just simmer until it cooks down a bit..about 20 minutes. Put in jars and proceed as you said.
Interesting! I put my lemon juice on the top. And I do boil my sauce. Seems to make it less watery. Not as big a deal when I’m working romas, but other tomatoes cause me problems sometimes. 🙂 Thanks for commenting!
Okay – question!!! I’ve never canned. There I said it. But I do a LOT of freezing sauces and the like. Can I do this whole process, but at the end just freeze in jars or containers? I have a 5 gallon buckets of tomatoes sitting on the counter staring at me.
Hi Ally, Yes! You can freeze them. If you do put them in glass jars though, leave a lot of head space – like 1-2 inches. Or the jar will bust. 😉 Good luck!
@Ally’s Sweet & Savory Eats,
I haven’t canned either but I have always done the way my mom did all those years ago, I put my whole tomatoes In a pot of boiling water and let them boil till the skin is easy to take off and while the tomatoes are hot, I peel them and mash Them up and put them in hot jars and seal them and put them on the table upside down til They cool completely and the seals Will have sealed and your done. I Do this kind of canning all my life. Green tomatoes with hot peppers, never had a problem with doing this all those years. Good luck.
When I used to have too many tomatoes I would freeze them whole until I was ready to make sauce. Then run them under hot water and the skins popped off. Chop them up, usually in a food processed, and boil for 1-2 minutes. Let cool and the liquid separates from the pulp. Put in a muslin bag or jelly bag to drain and the almost clear watery liquid drains out leaving rather thick tomato sauce or paste which you can season and simmer for sauce or just can or freeze. It has a fresh tomato flavor without the long simmering. Use the liquid to adjust the thickness. If you rather not have the seeds use a food mill to avoid loosing the pulp. In this hot weather the less cooking heat in the house the better.
If you were to use citric acid and pint jars instead of the “2 TBS bottled lemon juice per quart” how much citric acid would you use? New to canning.
I don’t know, Nicolette, as I’ve never used citric acid. Sorry I’m no help!
1/2 tsp of citric acid or 2 Tbsp of lemon juice per quart.
Thank You SO much! This worked so slick! I was canning the chopped tomatoes and they just had too much space in the jar once they cooled. I also LOVED skipping the skinning process! Thank You!
You’re welcome! Thanks for taking the time to leave a comment. 🙂
Looks so good. I keep telling my husband that we should buy a bushel of tomatoes (not enough sun or land in my yard) at the farmers market and can some tomatoes or better yet can his spaghetti sauce which is soooo good. I’m getting hungry just thinking about it.
Hi, I was happy to see that I’m not the only one that cans like that. You might like a recipe I posted on youtube…another tomato hack: https://www.youtube.com/watch?v=2kHFasUTUgk
If one cooks the crushed tomatoes for two to three hours, why the need to process them for another 45 minutes? Couldn’t one process them for fifteen minutes or so for sealing the jars?
If one cooks the crushed tomatoes for two to three hours in a pot, why the need to also process them for another 45 minutes? Couldn’t one process them for about fifteen minutes to seal the jars?
Hi Jeanette, You don’t have to cook them in the pot for that long if you don’t want to. I do, because it makes my sauce less watery. You do need to cook them that long in the water-bath canner because that’s what the experts recommend to kill botulism – and you don’t want botulism, for sure!!
I always use oven canning for tomatoes rather than water bath. Works perfectly!
45 min @250
I do just about everything you said, only I cook my tomatoes in a large stock pot first , then fill up just a cheap $5 blender and blend them up real good, pour in jars (with a tsp of canning salt and a squirt of lemon juice on the bottom of the jar) then put my flats and rings on and normally if you work fast they seal themselves, if not I hot water bath for 10 min. Been making them this way for 8 years now 🙂
Me too with my salsa for over 20 years, never a problem.
Last Summer I made salsa that was out of this world delish! I could have sworn the link to the recipe was on your page. Did you have a link for a Salsa recipe to can?
Hi Lori, I don’t have a canning safe salsa recipe, sadly. I need to get one though! Maybe you tried Jami from An Oregon Cottage’s recipe: http://anoregoncottage.com/my-favorite-salsa-for-canning/? Good luck!!
I just used regular tomatoes. Do you think after I blend these in the food processor that I could strain the juice out to reduce time cooking?
Yes, I think that would work just fine, Neisha! In fact, I’ve done it too. Good luck!
I have that food processor and I absolutely LOVE IT!!! I had to replace one that I had for about 22 years and one of my requirements was one that had variable speeds (read micro-adjustable) and after much searching, I found this one. PLUS, it’s not real loud, either <==BONUS! I would not trade it! I probably should buy a couple of more to get me through the rest of my life.
So many of the old methods of canning and pickling require the removal of skins and seeds. To do so means the discard of much valuable nutrition. I especially always include the seeds of peppers; the highest and best vitamin C from red ripened ones. Applesauce without the peel is as bland as store-bou8ght stuff. Thanks for the prep. methods and useful comments.
I’m making these today. It says to ladle the tomatoes and leave 1/2” of headspace, THEN put in 4T white vinegar. When I did that the jar was filled almost to the rim! That didn’t seem right, but I wasn’t sure what to do since the vinegar was already mixed in the batch so I didn’t want to try to take some out for fear of not having the right ratio. For the remaining jars I left 1/2” of headspace AFTER adding the vinegar. I guess I’ll see how these process- I’m pretty certain the one filled to the rim probably won’t seal