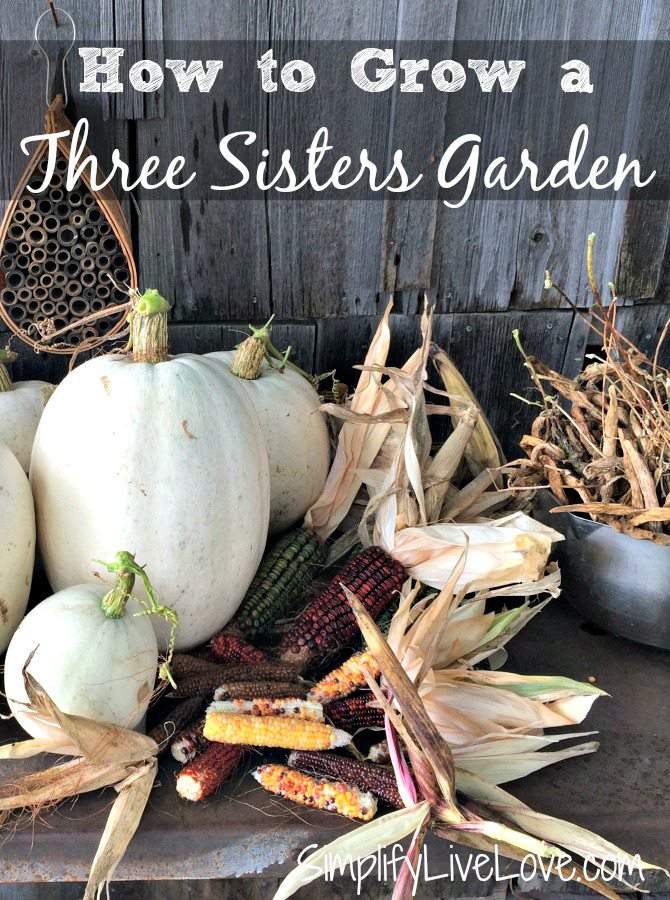
From Seed to Harvest: How to Grow a Three Sisters Garden
on May 04, 2026
This post may contain affiliate links. Please read our disclosure policy.
The Three Sisters Garden inspires gardeners around the world as a model of biodiversity, soil health, and cultural preservation. If you’d like to grow a Three Sisters Garden to celebrate the legacy of indigenous agriculture or for any other reason, we’ll teach you the ins and outs in this article including Three Sisters garden layout, what types of corn, beans, and squash to grow, and how to harvest and preserve your crops.

Table of Contents
What is a Three Sisters Garden?
If you’ve never heard of a Three Sisters Garden, you’re in for a treat as they are one of the most amazing agricultural techniques! A Three Sisters Garden is one of the most popular Native American gardening techniques that involves growing corn, beans, and squash together in a mutually beneficial arrangement.
It’s many thousands of years old and is a smart growing style if you’re interested in sustainable agriculture that produces bountiful harvests. In a three sisters garden, corn serves as poles for beans, and squash is a living mulch, grown in between corn stalks to help keep the weeds down.
The corn provides shade for the squash, and the beans provide nitrogen for the corn. Instead of depleting the ground of nutrients, this growing method leaves the soil richer than it started. It’s a win-win combo and a lot of fun to grow in home gardens.

The Three Sisters Legend
The Three Sisters legend is a traditional Native American story that explains the origins of the agricultural planting technique known as the Three Sisters Garden. This legend varies among different indigenous cultures, but it generally revolves around the symbiotic relationship between three staple crops in native diets: corn, beans, and squash.
One version of the legend comes from the Haudenosaunee (Iroquois) people of North America, who believe that the Three Sisters were gifted to them by the Earth Mother, also known as Sky Woman or Grandmother Earth. According to the legend, the Earth Mother provided the Haudenosaunee with seeds for corn, beans, and squash, along with instructions on how to plant and care for them.
In the legend, each of the Three Sisters has a specific job and significance:
- Corn: Representing the eldest sister, corn is the backbone of the Three Sisters Garden. Its tall stalks provide support for the beans to climb, while its sturdy roots anchor the soil and prevent erosion. Corn symbolizes strength, sustenance, and the interconnectedness of all living beings.
- Beans: Representing the middle sister, beans are valued for their ability to climb and intertwine with the corn stalks, forming a natural trellis. As legumes, beans have the unique ability to fix nitrogen in the soil, enriching it with essential nutrients for plant growth. Beans symbolize unity, cooperation, and reciprocity.
- Squash: Representing the youngest sister, squash serves as a protective companion to the corn and beans, trailing along the ground and shading the soil with its large leaves. Squash vines act as a natural mulch, suppressing weeds, conserving moisture, and maintaining soil temperature. Squash symbolizes humility, generosity, and balance.
Native American Wisdom
The Three Sisters legend embodies Native American Tribes’ teachings about the interconnectedness of all life forms and the importance of living in harmony with the natural world. It teaches respect for the Earth and gratitude for the gifts it provides, while also imparting practical wisdom about sustainable agriculture and ecological stewardship.
By embracing the principles of the Three Sisters legend and cultivating Three Sisters Gardens, indigenous communities and modern gardeners alike honor the wisdom of their ancestors and strive to create thriving ecosystems that nourish both body and spirit.

How to Grow a Three Sisters Garden
In my area of Eastern Iowa and Western Illinois, the Meskawki and Sauk Indians lived in huge summer cities with populations over 5,000 people. They worked together farming huge three sisters gardens to provide food for an entire year to feed their people.
I first learned about 3 Sisters Gardens by visiting the Hauberg Indian Museum at Black Hawk Park. This museum is small, but oh so interesting – well worth the visit if you’re in the area! It’s fascinating to learn about indigenous farmers and Native American gardening practices. We can get such useful advice from indigenous peoples if we take the time to study their ancient agricultural systems.
Benefits of Three Sisters Gardening
There are lots of benefits of a three sister garden. From an environmental perspective, this ancient gardening technique promotes soil health, biodiversity, and water conservation. It embodies principles of sustainability that resonate deeply with modern-day gardeners.
It’s also a great way to yield a bountiful harvest of corn, beans, and squash. Growing a combination of corn, beans, and squash is a way to add lots of vitamins, minerals, and proteins to your family’s diet. It’s a wholesome foundation for a healthy diet.
What Types of Corn, Beans, and Squash to Grow
When selecting plants for your Three Sisters Garden, consider choosing heirloom or open-pollinated varieties to preserve genetic diversity and support sustainable gardening practices.
Corn:
There’s such a huge variety of corn you can grow in your garden so you’ll have to decide if you want to grow corn for eating fresh, or dent corn for popping, drying and grinding, or even corn for decor. Here are a few of our favorite types of corn to grow:
Striped Japonica: This heirloom corn features variegated leaves with colorful stripes in shades of red, purple, yellow, and white. It’s the prettiest corn plant I’ve ever grown. It’s commonly used for making flour or cornmeal, as well as for decorative purposes in fall displays and crafts.
Hopi Blue: Another heirloom variety with striking blue kernels. It’s drought-tolerant and well-suited for dry, hot conditions. This corn is also grown to be used dry and it grinds into a beautiful blue flour that makes delicious cornbread!
Glass Gem Corn: This type of corn was bred by part-Cherokee farmer, Carl Barnes, from ancestral, Native American corn. It grows beautiful cobs in a rainbow of colors, ranging from translucent blues, purples, pinks, and yellows to more opaque shades. It’s mostly grown to be used dry to make cornmeal, flour, or popcorn.
Beans:
Pole beans, or climbing beans, are the best choice when planting a Three Sisters Garden. You can eat them fresh or leave them on the plants to use as dried beans after harvest.
Essentially you want to choose a type of bean plant that will grow long, vining stems as they climb up the corn stalks, utilizing them as natural trellises for support. This symbiotic relationship benefits both crops, as the beans gain elevation and access to sunlight, while the corn enjoys the nitrogen-fixing properties of the beans’ roots. While you can grow bush beans in the three sisters garden, it’s better to grow them elsewhere in the garden as they don’t need the support that pole beans need.
Here are a few of our favorite types of pole bean plants to grow in the three sisters garden.
Cherokee Trail of Tears: A historic variety of pole bean with purple pods and excellent flavor. It’s well-adapted to climbing corn stalks and provides a beautiful contrast in the garden.
Rattlesnake Pole Bean: Named for its mottled green pods resembling a rattlesnake’s markings, this heirloom variety is flavorful and productive.
Kentucky Wonder Pole Bean: This is a classic heirloom variety of pole bean prized for its productivity, flavor, and versatility in the garden. It is one of the most popular and widely grown pole bean varieties in home gardens and market farms across the United States. It’s a multi use bean great for drying, shelling, and eating green.
Squash:
When selecting squash varieties for your Three Sisters Garden, you’ll want to consider factors such as climate, growing season length, and what you like to eat. You can grow summer squash or winter squash varieties, or you could also grow gourds or pumpkins for fall decor.
If you want a continuous harvest of fresh, nutritious produce throughout the growing season and to enhance the biodiversity and resilience of your garden ecosystem choose a mix of types!
Waltham Butternut: A classic butternut squash variety with sweet, nutty flesh. It’s prolific and stores well, making it a favorite among gardeners.
Delicata: Also known as sweet potato squash, Delicata squash has a creamy texture and a rich, sweet flavor. Its smaller size makes it ideal for smaller gardens.
Blue Jarrahdale Pumpkin: Blue Jarrahdale Pumpkin prefers warm temperatures and long growing seasons. It produces large, flavorful fruits that store well and also make beautiful fall decor.

Three Sisters Garden Layout
There are various layout options for a Three Sisters Garden, each with its own merits. The classic approach involves first planting corn seeds in mounds or hills spaced several feet apart. Then plant the beans and squash once the corn is large enough.
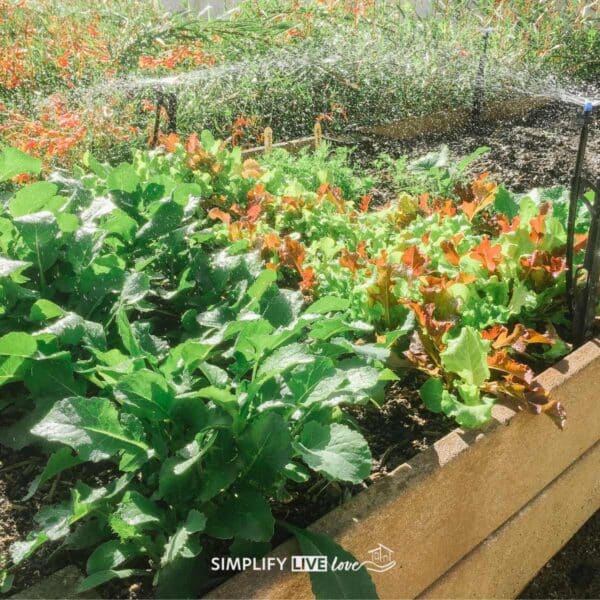
Alternatively, you can grow a small three sisters garden in a raised bed. We’ll talk through both options, but growing in a large space is our preference.
A 10′ x 10′ space is ideal so the corn, beans, and squash have plenty of room to grow. Here’s how to plant the three sisters garden in a 10’ x 10’ space.
First, plant the corn
- Plant 6-7 corn seeds in three foot hills. Make sure the seeds are planted 1-2 inches deep. Plant corn seeds in warm, fertile soil after the danger of frost has passed, spacing them 8-12 inches apart within each mound.
- Since corn is usually pollinated in rows to ensure successful pollination, you will need multiple hills in order for the corn to pollinate correctly and develop nice ears.
- Space the hills 4 feet a part.
Second plant the beans
- Once the corn has popped up and is about 4 inches tall, thin to 4-5 plants per hill. Plant 4 bean seeds around each corn plant.
Finally, plant the squash
- Finally, plant squash seeds or seedlings at the edges of the mounds. The squash vines should sprawl so they shade the soil.
To ensure the success of your Three Sisters Garden, pay attention to planting. Beans can be sown directly into the soil once the soil temperature reaches at least 60°F, while squash seeds should be planted 1 inch deep and spaced 2-3 feet apart.
Throughout the growing season, provide consistent moisture to support vigorous growth, taking care not to overwater. Mulching around the base of plants can help retain soil moisture and suppress weeds. Regularly monitor for pests and diseases, employing organic methods of control when necessary to maintain a balanced ecosystem within your garden.
Pin this now to find it later
Pin ItCan I grow a Three Sisters Garden in Raised Garden Beds?
Yes, you can on a much smaller scale. The one concern is that corn pollination may be a little more difficult. Follow the same steps as above by starting with your corn and then planting the beans and squash.
Since you won’t have a lot of corn plants in the small space of a raised bed, you may need to pollinate the corn manually. To manually pollinate corn, just gently shake the stalks to distribute pollen or manually transfer pollen from tassels to silks.
What kind of soil is best for a Three Sisters Garden?
Choose well-draining, fertile soil with a pH around 6.0-7.0. Amending with compost or aged manure can improve soil fertility and structure
How often should I water a Three Sisters Garden?
Water consistently to keep the soil evenly moist, especially during dry periods. Avoid overwatering, as excessive moisture can lead to root rot.

Troubleshooting and Common Issues with Three Sisters Gardens
Despite its many virtues, the Three Sisters Garden may face some challenges. Pests such as corn earworms or squash vine borers can wreak havoc on vulnerable crops, while diseases like powdery mildew may affect squash plants in humid conditions. To mitigate these issues, practice crop rotation, companion planting, and diligent garden hygiene to create a resilient and thriving ecosystem.
Make sure to read these posts on natural pest control methods for keeping cucumber beetles, squash vine borers, and squash bugs out of your garden.
Can I use companion plants in a Three Sisters Garden?
Yes, the concept of companion planting is useful in all gardens. Plant flowers and herbs like marigolds, nasturtiums, and herbs to help deter pests and attract beneficial insects. Companion planting is great way to enhance the overall health of your garden.
Another common addition to the Three Sisters Gardens are sunflowers, which are sometimes called the “fourth sister.” Sunflowers provide numerous benefits to the garden, including attracting pollinators, providing shade and support for the beans, and adding visual interest with their vibrant blooms.
Can I save seeds from a Three Sisters Garden for future planting?
Yes, you can save seeds for future planting as long as you grow open-pollinated varieties of corn, beans, and squash.. Be sure to properly dry and store seeds to maintain viability.

How to Harvest the Three Sister Garden
You’ll harvest each of three types of produce differently, depending on what you’re growing. Here’s how to harvest the corn, beans, and squash from your three sisters garden.
Harvest Corn
Harvesting corn for drying versus eating fresh requires different considerations and techniques to ensure optimal quality and storage. Here’s how to harvest corn for each purpose:
Harvesting Corn for Drying (Field Corn or Popcorn):
Check Maturity: Wait until the corn reaches full maturity before harvesting for drying. Mature corn will have dried husks, kernels that are hard and well-developed, and a lower moisture content compared to sweet corn.
Check the Husks: Inspect the husks for dryness and color. Mature corn husks will turn brown and papery as the corn dries down. Pull back the husks slightly to check that the kernels are fully developed and dry.
Test a Kernel: Squeeze a few kernels with your fingernail. If the kernels dent rather than puncture, the corn is likely ready for harvest.
Harvest: Use a sharp knife or pruning shears to cut the corn stalks just above ground level. Harvest the ears when the husks are fully dry and the kernels are hard and mature.
Dry the Corn: Hang the harvested corn in a well-ventilated area with good airflow, such as a barn or shed. Allow the corn to air dry for several weeks or until the kernels are thoroughly dried. You can also remove the husks and spread the corn out in a single layer to dry on a screen or mesh tray.
Store: Once fully dried, remove the kernels from the cobs and store them in a cool, dry place in airtight containers or bags. Properly dried and stored corn can last for several months to a year.
Harvesting Corn for Eating Fresh (Sweet Corn):
Check Ripeness: Harvest sweet corn for eating fresh when the kernels are plump, tender, and filled with sweet, milky juice. Sweet corn is best harvested when the kernels are at the “milk stage,” typically about 20 days after the appearance of silk.
Inspect the Ears: Look for ears with bright green husks and fresh, undamaged silk. Peel back the husks slightly to check that the kernels are fully formed and filled out.
Harvest: Twist the ear downward and pull it from the stalk with a firm, smooth motion. Harvest sweet corn just before cooking for the best flavor and texture.
Store and Enjoy: Sweet corn is best enjoyed fresh, so plan to eat it soon after harvest for the most flavorful experience. If you have excess corn, you can blanch and freeze it for longer storage.
Harvest Beans
If you’re growing beans for eating fresh, pick the beans while they’re young and tender for optimal flavor.
If you’re letting the beans dry:
Monitor the Pods: As the bean pods mature, they will begin to change color and dry out. Depending on the variety, the pods may turn yellow, brown, or even black. The pods will also become firm and dry to the touch.
Choose the Right Time: Wait until the majority of the bean pods on the plant have fully dried before harvesting. Avoid harvesting beans too early, as immature pods may not produce fully developed beans.
Harvest the Pods: Use scissors or pruning shears to cut the dried bean pods from the vine. Leave a short stem attached to the pod to make handling and drying easier.
Prepare for Drying: Spread the harvested bean pods in a single layer in a well-ventilated area with good air circulation. Choose a location that is dry, warm, and out of direct sunlight.
Allow to Dry: Let the bean pods air dry for several weeks, or until they are completely dry and brittle. You can test the beans by trying to snap them in half; if they break cleanly, they are fully dry.
Shell the Beans: Once the pods are fully dry, remove the beans from the pods. This can be done by hand or by gently crushing the pods to release the beans.
Store the Dried Beans: Store the dried beans in a cool, dry place in an airtight container to prevent moisture and pests from spoiling them. Properly stored, dried beans can last for up to a year or more.
Harvest Squash
Monitor Squash Growth: Keep an eye on your squash plants as they grow. Different varieties will have different maturity indicators, but generally, squash is ready to harvest when the fruits reach their mature size and color. Make sure to keep track of details in your garden journal so you know about when they might be ready to pick.
Summer Squash
Check for Ripeness: For summer squash varieties like zucchini and yellow squash, harvest the fruits when they are still young and tender, typically 6-8 inches in length. Look for firm, glossy skin and vibrant color. Avoid letting summer squash get too large, as they can become tough and bitter. Refrigerate Summer squash and use within a few days for best quality.
Winter Squash:
Winter squash varieties like butternut squash, acorn squash, and spaghetti squash are typically harvested when the fruits reach full size and develop a hard, tough skin. The rind should be firm and resistant to scratching with your fingernail. The color of the squash may also deepen or change as it matures.
Use Pruning Shears or a Knife: When harvesting squash, use sharp pruning shears or a knife to cut the fruit from the vine. Leave a short stem (about 1-2 inches) attached to the squash. This helps prolong storage life and prevents moisture loss.
Handle with Care: Handle the harvested squash gently to avoid bruising or damaging the skin. Rough handling can lead to premature spoilage or decay.
Remove Excess Leaves: After harvesting squash, consider removing any excess leaves or vines from the plant. This allows more sunlight to reach the remaining fruits and promotes airflow, reducing the risk of disease.
Store Properly: Store harvested squash in a cool, dry place with good air circulation. Stor Winter squash for several months in a dry, cool environment with temperatures around 50-55°F (10-13°C).
Hopefully, we have inspired you to give the Three Sisters Garden a chance. It’s more than a
sustainable and productive approach to gardening. It’s also a connection to the wisdom of indigenous cultures and the natural world. Go forth and garden!


Wonderful post! We will have to try this!
Thanks, Michelle! Good luck! <3
Hi Michelle this is so interesting! I love the old legend. It’s so useful to remember stories like this to keep the garden plan in my head at planting and garden planning time . Those old ways have a lot of value:)
We actually almost did this! Our corn is in square block patches this year and the squash is planted in hills in between those blocks. Our hill beans are close by. Not exactly your plan, but close! Happy Gardening!
I wish I had an area big enough to give this a try, but my raised bed just aren’t big enough. This is such a great idea. I’ll have to remember it so if we end up with a bigger garden someday, I can give it a try.
I’ve always wanted to try this, Michelle, but always thought the beans would be shaded – your timing tips are perfect!
My junior chef has a recipe for Three Sisters Stew that he loves to prepare for our family. We will have to try to grow our own ingredients this year!
i had never heard of a three sisters garden until a neighbor said something last fall. I am so excited to try it. we don’t have a lot of space and I can’t wait to get these three things going in their spot. I have actually seen several of these in our area and jus assumed it was some kind of accident that it ran all together. I’m glad to find out the truth. lol. thanks so much.