How to Prepare Seed Potatoes for Planting to Prevent Spoilage & Rot
on Feb 17, 2024, Updated Jan 20, 2025
This post may contain affiliate links. Please read our disclosure policy.
Learning how to prepare potatoes for planting is easy to maximize your potato harvest. It isn’t hard, but you don’t want to skip these steps to ensure your potatoes don’t rot in the wet spring ground.
I started growing potatoes many years ago and they quickly become one of my favorite vegetables. They’re easy and fun; harvesting them is like going on a treasure hunt. I also feel like I get a big bang for my buck.

Table of Contents
Tips for Gardening with Seed Potatoes
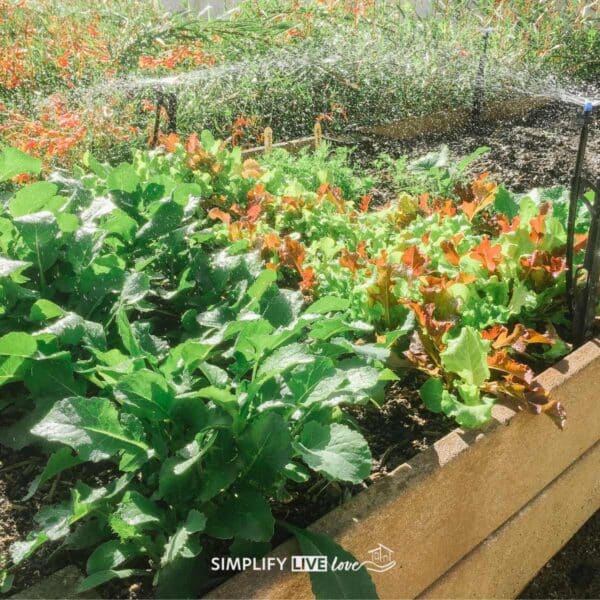
Potatoes are very easy for home gardeners to grow! You can grow them in raised garden beds, plant them directly in the ground, in hay bale gardens, or you can plant them in grow bags too.
I also like growing potatoes because they’re one of the earliest spring crops to plant. Plant potatoes 2 to 4 weeks prior to your last frost date. Follow all my tips below to keep your seed potatoes from rotting in the cold, wet ground.
Always check your frost dates and soil temperature when deciding when to plant your garden! Doing so will keep you out of a lot of trouble.
Conventional potatoes are heavily treated with chemicals and are at the top of the dirty dozen list, so I prefer to buy organic potatoes.
However, organic potatoes aren’t always that easy to find, and they’re expensive. Growing my potatoes is an excellent option for me. It’s a big bang for the buck and fills my pantry with delicious potatoes we eat most of the year.
Pin this now to find it later
Pin It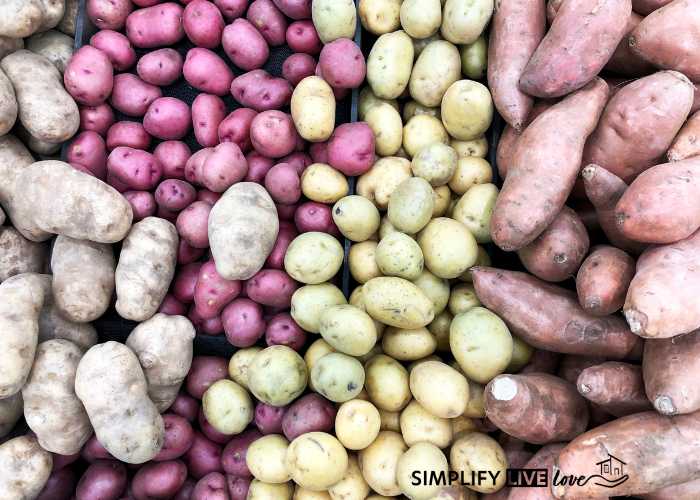
Where Can I Find Seed Potatoes?
When looking for seed potatoes to plant in your garden, it’s important to buy certified seed potatoes. It’s tempting to plant pre-sprouting potatoes from your kitchen in your garden, and I have certainly done it, but I will tell you why it might not be worth the risk.
I buy seed potatoes from a variety of places including Stringtown, one of my favorite Amish stores in Kalona, and Seed Savers Exchange.
Seed catalogs mail the seeds when growing conditions are conducive to planting. I love finding that box of potatoes on my doorstep each year!
You can also order seed potatoes from Tractor Supply or Territorial Seed and they’re even available on Amazon!
Here are several different types of seed potatoes you buy on Amazon:
I’ve grown all of the varieties of potatoes listed above and more! This year, I plan to grow German Butterball, Yukon Gold, Pontiac Red potatoes, and maybe a blue or purple potato too. They’re just fun to grow!

Can I Plant Grocery Store Potatoes?
Some people ask if they have to plant seed potatoes. Since conventional grocery store potatoes have been sprayed with sprout inhibitors to prevent sprouting during storage, normal grocery store potatoes might rot instead of grow. If you go to all the work to plant seed pieces in your garden, I’m sure you want to give your potatoes the best chance of producing a lot of potatoes!
What about organic grocery store potatoes? You might be wondering if you can plant them. It’s true that organic potatoes are not sprayed with sprout inhibitors. Still, they are also not screened for potato diseases, which could mean you plant potatoes that look healthy when looking at the foliage but have rotten tubers. It is best to plant certified disease-free seed potatoes if you can.
How to Prepare Seed Potatoes for Planting
Once you’ve decided what types of potatoes to grow and it’s ready to plant, here’s how to prepare your potatoes for planting. Take them out of the bags and examine them for damage or rot.
A soft potato can be planted, but a rotting one can not. You’ll know a potato is rotting if it stinks and is moldy.

Bigger potatoes can be cut to make more seeds! But, before you cut them, ensure each piece has at least one eye and is not too small. Around an inch is the recommended size for seed potatoes.
After years of cutting potatoes, I have found that larger potato seeds yield a better harvest. So, I try not to cut my seed potatoes too small. Sometimes, I don’t cut them at all.

How and Why to Cure Seed Potatoes
Fingerling potatoes can be kept whole or cut down the middle or crosswise. Again, ensure that each piece has at least one eye on it. If there’s no eye, the potato won’t grow.
Now, spread the potato pieces out on cookie sheets {disregard my rusty cookie sheet – I promise I don’t use it for baking…} and put them in a sunny location.
Let them cure for 1-2 days. This step is essential so the cut spots will form a protective crust against rot which is common with a wet and chilly spring.

See the crust on the cut potato? These potatoes are ready to plant!
Depending on the humidity, it may take longer than a few days, so bring them in at night or leave them to dry in a dry, sunny window.
Once the crust is formed, place the potato, so the eyes are ‘up.’ If they haven’t sprouted much, put them in a sunny location to encourage growth. Place the now-dry potato crust side on a paper towel to ensure it stays dry, and allow the eyes to begin sprouting.
You do not want to see excessive growth. You want to watch the eyes. Once you notice they are getting bigger or bulbing outward, you’ll want to plant them as soon as possible.
Track Your Potato Growing Season with a Garden Planner
Make sure to write down how many seed potatoes you plant to keep track of what happens in your garden. Write down the planting date and, as the season progresses, write down few harvesting notes too. Writing these little notes help you stay on track and make better decisions next year!
Now, I use my garden planner to track all my garden information. I keep my notes, seasonal issues, and lessons learned written and neatly organized, letting me observe how many bushels of potatoes I grow and how much of a harvest I have to fill my pantry shelves with homegrown, organically raised potatoes all canned or stored for fresh eating.
Remember, I also have a free garden planner download for my blog subscribers! Get instant access to my Subscriber Library by signing up for my email list.
Sustainable Gardening Tips
Sometimes seed potatoes come in great cloth bags. Remember not to throw out those fabulous seed potato bags! They make great, reusable produce bags to take to the grocery store or farmer’s market!! Or, you can use them to store your potato or onion harvest later!
What’s your favorite type of potato to grow?
Did you know I wrote my first book? You will love my new book – part homesteading tutorial and part cookbook. If you want to take the next step toward self-sufficiency, learn how to raise your own chickens for meat! Or if raising chickens for meat isn’t for you, you can also learn how to utilize the entire chicken in your kitchen to save you money and help your family be a little bit greener.
More Gardening Posts You’ll Love
- Growing Potatoes the No-Dig Method
- What You Need to Know about the Colorado Potato Beetle
- How to Store Potatoes Over Winter
- Top 10 Vegetable Plant for Early Spring Harvest
- How to Start Seeds Indoors to Save Sanity, Time, & Money
- When to Start Seeds Indoors for Spring Planting
- Must Know Gardening Tips for Beginners
- Where to Find Free Mulch


Oh this is so neat! I have to do this for us this summer! We always do a small garden, would love to grow potatoes!
I am ordering my potatoes from Seed Savers…I hope it goes as well as yours do 🙂 Do you hapeen to have a coupon code to share?
I don’t, Ann. They share them on facebook sometimes! I will be on the lookout as I want to order my potatoes as well.