No-Dig Potato Growing Guide: The Easiest Method for Home Gardeners
on Mar 30, 2026
This post may contain affiliate links. Please read our disclosure policy.
Want to grow delicious potatoes without breaking your back? The no-dig potato growing method is perfect for gardeners of all experience levels. Here are the best tips for growing potatoes the easy way, while maximizing your harvest!
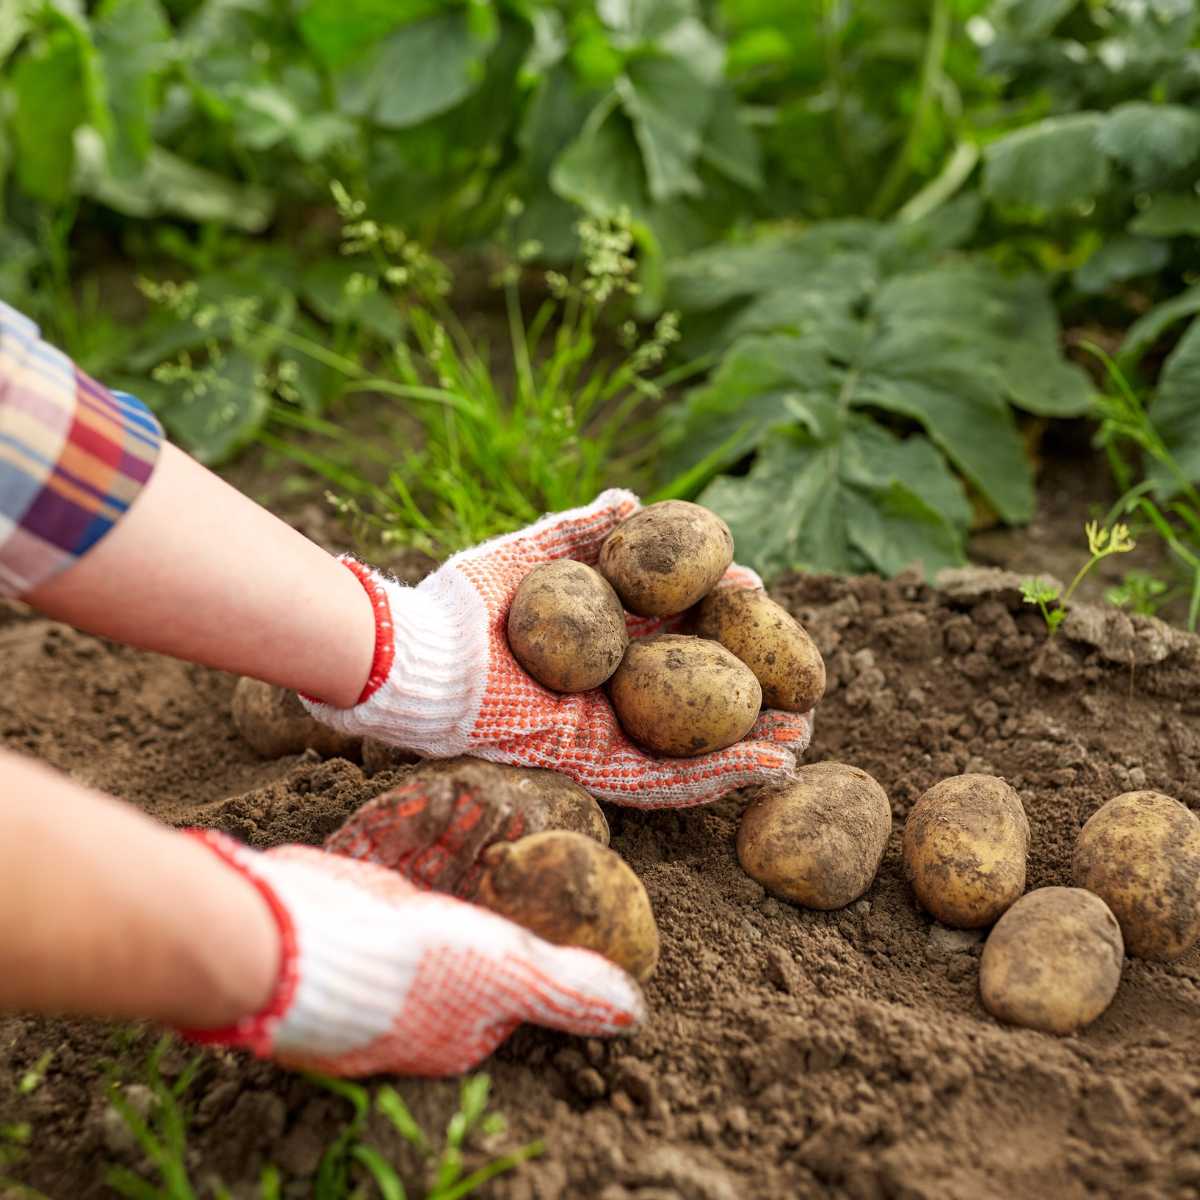
Table of Contents
- Why Grow Potatoes Using the No-Dig Method?
- When to Plant Potatoes
- How Late Can You Plant Potatoes?
- Selecting the Best Seed Potatoes
- Step-by-Step No-Dig Planting Method
- Watering Requirements for Healthy Potatoes
- Mulching and Hilling Your Potato Plants
- Good Companion Plants for Potatoes
- When and How to Harvest Potatoes
- Storing Your Potato Harvest
- Troubleshooting Common Potato Problems
Why Grow Potatoes Using the No-Dig Method?
Growing your own potatoes offers multiple benefits beyond just delicious taste. In addition to growing lettuce, brussels sprouts, and rhubarb, potatoes are one of my very favorite crops to grow.
Store-bought potatoes often contain significant pesticide residue (they’re on the Environmental Working Group’s “Dirty Dozen” list), making home-grown organic potatoes a healthier choice for your family.
The no-dig method specifically offers these advantages:
- Saves time and effort – no back-breaking trenching required
- Reduces moisture loss from the soil
- Minimizes weed growth by not bringing weed seeds to the surface
- Improves soil health by not disrupting beneficial soil organisms
- Makes harvesting easier when it’s time to dig up your treasure
Beyond health benefits, growing potatoes is simply rewarding! The plants are pretty in the garden, and harvesting feels like a treasure hunt as you discover what’s hiding in the soil.

When to Plant Potatoes
Spring Planting Time
Potatoes are one of the early spring crops you can plant. While many gardening resources suggest planting by St. Patrick’s Day, timing varies by region:
- Zone 5b (like my Iowa garden): Early to mid-April is ideal
- Northern areas: Late April may be better
Soil Temperature Matters
The key factor for successful potato planting is soil temperature:
- Optimal soil temperature: 59°F to 68°F (15°C to 20°C)
- Minimum soil temperature: 45°F (7°C)
Planting in cold, wet soil leads to rotting rather than sprouting. However, potatoes should be planted before your last frost date if possible, as young plants can tolerate light frost.
How Late Can You Plant Potatoes?
Most potato varieties need 90-120 days to mature. While technically you could plant early varieties in early summer, soil temperature becomes a limiting factor:
- Potatoes develop weak roots in hot soil
- They prefer cool, moist growing conditions
- Late plantings risk not maturing before fall frosts
For best results, stick with early spring planting when soil is workable but still cool.
The ISU Extension Office advocates planting seed potatoes 3-4 inches underground, and according to folklore, they should be planted on Good Friday in my zone, Zone 5. I don’t know about you but digging a 3-4″ trench and covering potatoes with that many inches of soil sounds like an awful lot of work I’d rather not do.
Selecting the Best Seed Potatoes
Why Use Seed Potatoes?
Always start with certified seed potatoes from garden centers or reputable sources like Seed Savers Exchange. While you can grow from grocery store potatoes, they often contain sprout inhibitors and may introduce diseases.
Best Potato Varieties for Home Gardens
I recommend growing a mix of varieties for a staggered harvest and different culinary uses:
Early Season (90 days or less)
- Red Norland – Ready in 90 days, great for new potatoes
- Purple Majesty – Matures in 85-90 days with unique purple coloring
- Yukon Gold – Mid-season (100 days) with excellent flavor (my personal favorite!)
Late Season (100+ days)
- Kennebec – Matures in 110 days, excellent for storage
- German Butterball – Takes 110-135 days but worth the wait for flavor
- Adirondack Blue – Interesting blue flesh (turns grayish when cooked)
The Rodale’s Illustrated Encyclopedia of Organic Gardening advocates a “no-dig” approach. I love the no-dig approach because it reduces time it takes to plant, makes back breaking digging unnecessary, reduces loss of moisture, and results in fewer weeds being brought to the surface. I’ve been planting potatoes using this method for about 8 years now and love how easy it is to grow potatoes.
Preparing Seed Potatoes
Before planting:
- Cut large seed potatoes into pieces with 2-3 eyes each
- Allow cut surfaces to dry and form a protective crust for 1-2 days
- This crucial step prevents rotting in cool, damp soil
Read my article with all the ins and out of preparing seed potatoes for planting.
Pin this now to find it later
Pin It
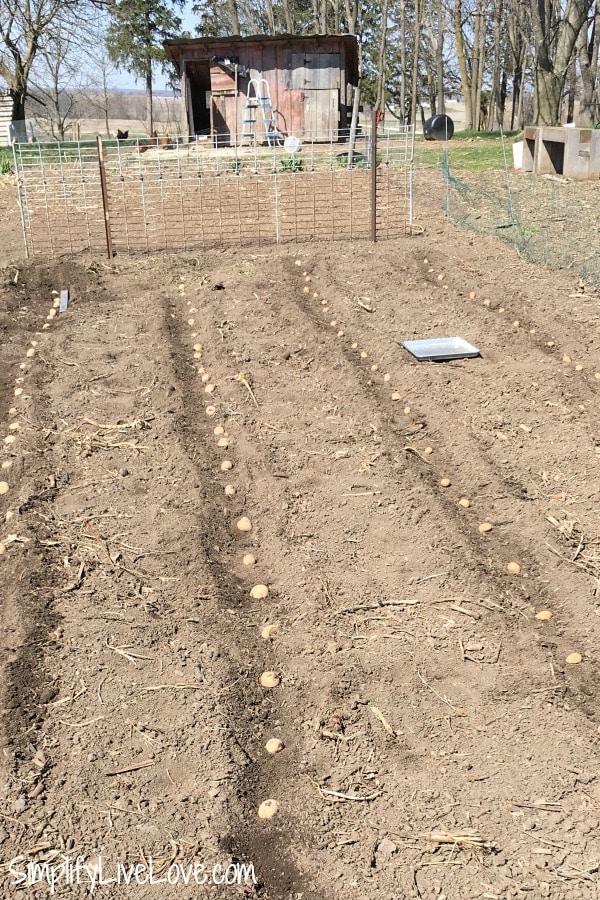
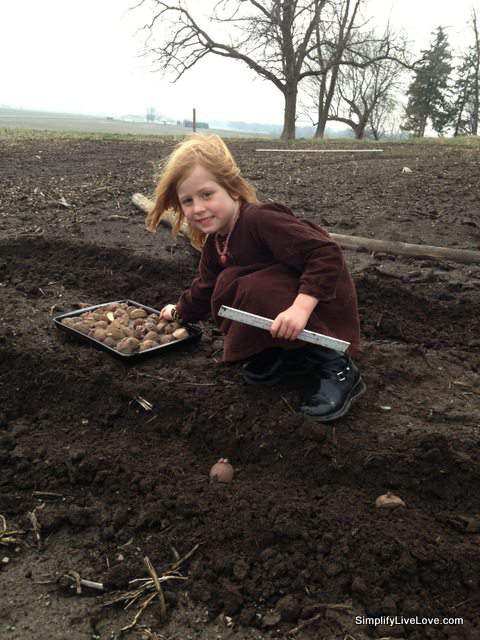
Step-by-Step No-Dig Planting Method
Traditional methods recommend digging 3-4 inch trenches for potatoes – that’s a lot of work! The no-dig approach is much simpler:
Materials You’ll Need
- Seed potatoes (prepared as described above)
- Garden hoe or similar tool
- Quality compost or aged manure
- Mulch material (straw, wood chips, or leaf mulch)
No-Dig Planting Instructions
- Prepare the planting area: Clear away any weeds and loosen the soil surface
- Add fertility: Spread a layer of compost or aged manure (I use composted chicken bedding)
- Create shallow trenches: Hoe very shallow furrows only ½ to 1 inch deep
- Position seed potatoes: Place them 12-18 inches apart with eyes facing up
- Cover lightly: Add a thin layer of rich soil over the seed potatoes
- Space rows properly: Keep rows 2-3 feet apart for good air circulation
Once the potatoes start to grow, replenish the mulch as necessary to keep them covered. The Rodale’s Illustrated Encyclopedia of Organic Gardening recommends covering the mulch with grass clippings once the plants are big enough to meet across the rows.
Soil Requirements
Potatoes grow in most soil types but prefer:
- Well-draining soil
- Slightly acidic pH (5.3 to 6.0)
- If your soil stays consistently wet, consider raised beds

Watering Requirements for Healthy Potatoes
Proper watering is critical for potato development:
Water Needs Throughout Growth
- Weekly requirement: 1-2 inches of water per week
- Consistency is key: Maintain even moisture
- Monitoring: Use a rain gauge to track natural rainfall
Watering Problems to Avoid
- Overwatering early season: Causes misshapen potatoes
- Underwatering: Results in curled leaves and late tuber formation
- Inconsistent watering: Can lead to growth cracks in tubers
Watering Methods
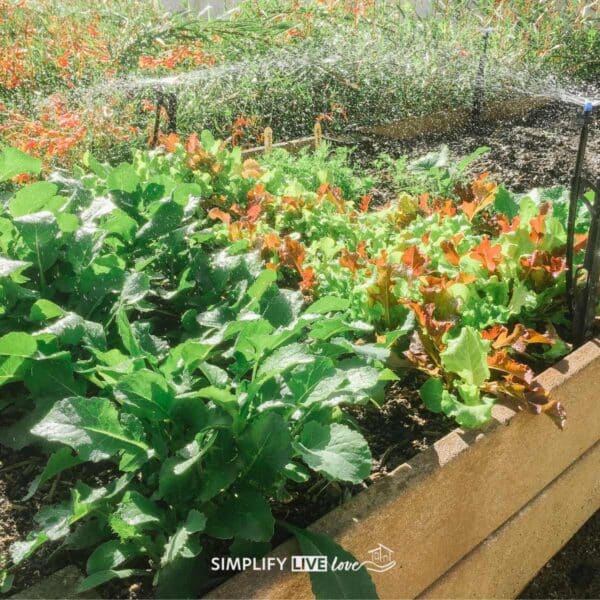
A drip irrigation system is ideal for potatoes as it:
- Provides consistent moisture
- Delivers water directly to the root zone
- Minimizes disease by keeping foliage dry
Mulching and Hilling Your Potato Plants
Why Mulch Potatoes?
Once plants reach a few inches tall, apply a thick layer of mulch for multiple benefits:
- Conserves soil moisture
- Suppresses weeds
- Keeps developing tubers covered (preventing greening)
- Maintains cooler soil temperatures
Mulching Materials
Choose from several effective mulching options:
- Wood chips (my preference, often available free)
- Straw (excellent for potatoes, breaks down to improve soil)
- Grass clippings (apply over other mulch once plants are large)
Hilling Technique
As plants grow, you’ll need to “hill” them:
- Add additional soil or mulch around the base of plants
- Cover any exposed potatoes to prevent greening
- Continue this process throughout the growing season

Good Companion Plants for Potatoes
Companion plants are great to add all around the garden. Specific herbs, flowers, and other vegetables help potato plants grow better, keep away pests, and make your garden more productive.
Beneficial Companions
- Beans: Fix nitrogen in the soil to feed potatoes
- Cabbage: Shallow roots won’t compete with potatoes
- Marigolds: Repel destructive Colorado potato beetles
- Nasturtiums: Act as trap crops for potato beetles (plant away from potatoes)
Plants to Avoid Near Potatoes
Keep these plants away from your potato patch:
- Tomatoes (related family, can spread diseases)
- Cucumbers
- Turnips
- Sunflowers
- Pumpkins
Here’s what you need to know to keep your potatoes safe from Colorado potato beetles!
When and How to Harvest Potatoes
New Potatoes (Early Harvest)
For tender, small potatoes with thin skins:
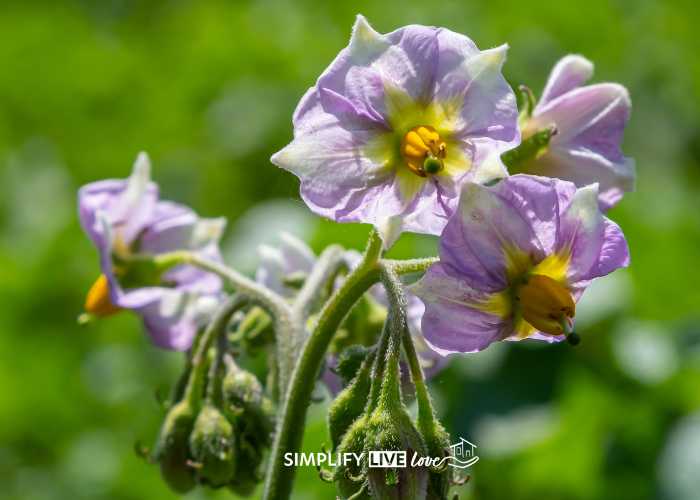
- Wait until 2-3 weeks after plants finish flowering
- Gently dig near plants and remove a few potatoes
- Leave the plant intact to continue producing
Main Crop Harvest
For storage potatoes:
- Wait until vines die back naturally
- Leave potatoes in ground 2-3 weeks after vine death
- Choose a dry day for harvesting
- Carefully dig with a garden fork to avoid damaging tubers
Curing for Storage
Proper curing improves storage life:
- If under 80°F: Leave potatoes in field for 2-3 dry days
- If over 80°F or wet: Cure in a cool, covered area
- Curing toughens skins and extends storage life
Storing Your Potato Harvest
If you plan to store potatoes over winter, wait until after the plants die back before digging them. Dig them two to three weeks after the vines die back on a dry day during dry weather if possible.
If the temperature is below 80 degrees, let the potatoes cure in the field for two to three dry days. Curing matures the skins and helps them last longer in storage. If the weather is going to be wet or it’s over 80 degrees, cure them in a cool, covered area where they will stay dry.
Optimal Storage Conditions
For long-term storage:
- Temperature: 40-45°F (4-7°C)
- Humidity: 85-90%
- Dark location (prevents greening)
- Good ventilation
Green Potato Prevention
Green potatoes contain solanine, a toxin that can cause illness:
- Prevention: Keep tubers covered with soil or mulch during growing
- Slightly green potatoes: Peel deeply to remove green portions
- Very green potatoes: Discard instead of eating
Troubleshooting Common Potato Problems
Colorado Potato Beetle
This common pest can devastate potato plants:
- Identification: Yellow and black striped beetles and red larvae
- Prevention: Companion plant with marigolds
- Treatment: Hand-picking, organic sprays like spinosad, row covers
Potato Scab
A bacterial disease causing corky spots on tubers:
- Prevention: Maintain soil pH below 5.5
- Treatment: Crop rotation, resistant varieties
Blight
Fungal disease that can destroy plants:
- Prevention: Good air circulation, avoid overhead watering
- Treatment: Remove infected plants, apply organic fungicides
More Gardening and Potato Tips You’ll Love
- 200 pounds of potatoes each year
- How to store garden seeds
- From Seed to Harvest: How to Grow a Three Sisters Garden
- Growing Green Thumbs: 12 Gardening Activities for Kids
Did you know I wrote my first book? You will love my new book – part homesteading tutorial and part cookbook. If you want to take the next step toward self-sufficiency, learn how to raise your own chickens for meat! Or if raising chickens for meat isn’t for you, you can also learn how to utilize the entire chicken in your kitchen to save you money and help your family be a little bit greener!
How to Grow Garden Vegetables Series
Want to learn how to grow all the garden vegetables? Check out my How to Grow Series and learn to garden like a champ! More posts coming soon!
- How to Grow Broccoli from Planting to Harvest
- How to Grow Brussels Sprouts
- How to Grow Carrots from Planting to Harvest
- How to Grow Corn in Your Backyard Garden or Homestead
- 21 Tips for Growing Cucumbers in Raised Beds & Containers
- Beginner’s Guide to Growing Garlic
- How to Grow Lettuce Like a Champ
- How to Grow Big, Flavorful Onions from Planting to Harvest
- Growing Snap Peas, Shelling Peas, and Snow Peas
- Growing Potatoes the No-Dig Way
- What You Need to Know to Grow Yummy Big Strawberries
- Growing Rhubarb – Tips & Tricks for a Good Harvest
- 19 Secret Tomato Growing Tips
- How to Grow Zucchini in a Pot


You have some amazing tips and recipes, I wanted to share this one with you that my daughter brought home from school for “Energy Bars”
1 c. brown sugar (either light or dark, have even used 1/2 sugar and 1/2 molasses-love the flavor)
1 c. vegetable oil ( I used 1/2 c. olive oil and 1/2 cup all natural applesauce)
2 eggs
2 c. oats (I have used both old fashioned and steel cut)
1 1/2 c. flour (I use whatever flour I have on hand; white, wheat, oat, bran)
1 c. raisins (either yellow or purple raisins I dehydrate myself)
1 c. peanuts (I use shelled peanuts that my girls shuck from the shells of bulk peanuts-what a mess that can make!)
1 c. coconut (Can use the store bought stuff, but a home dried coconut tastes WAY better!)
1 1/2 tsp. ground cinnamon
1 1/2 tsp. groung cloves
1 tsp. baking soda
1/4 tsp. salt (You can leave this out of the nuts you choose to use are alreadly salted)
Honey/Agave Glaze
1/4 c. honey or agave nectar
2 T. unsalted butter (don’t need the extra salt, and don’t use margarine – it has too much water in it, along with other icky stuff)
Warm slowly in microwave over 1/4 power until butter melts into the honey/agave nectar and stir.
Heat oven to 350 degrees. Grease 11″x 17″ pan (or 2 smaller pans if that is what you have-to make them as thick or thin as you want-thin are crispier, thick are chewier) Mix brown sugar, oil (and applesauce) and eggs until smooth. Stir in remaining ingredients. Spread mix into pan. (This is kind of like spreading out rice krispie treats.. very sticky and make sure you keep your hands damp with a little water so it doesn’t stick) Bake until the center is set, but not firm (around 16-22 minutes-watch them close at the 15 minute mark depending on your oven). Remove from over and let cool for 15 minutes. Drizzle honey/agave mixture over bars, spreading around with a spatula. Let cool completely. Cut into bars and wrap individually in plastic wrap, storing in the refridgerator. Can be frozen for up to 6 months.
The thing I like most about this recipe is the flexibility you have. You can change up the raisins, peanuts, coconut and seasonings and make any type of granola bar you want. I have used light and dark brown sugar, and even molasses to give a new flavor. And ground flax seed is my secret weapon for healthy fats and protein. I have added a splash (1/2 tsp) of vanilla or almond extract as well. I am experimenting now with rolling the mixture into balls (a bite or 2) and baking them for 1/2 the time, then drizzling melted chocolate and peanut butter chips over them. I dehydrate a lot of fruits, only because their flavor only intensifies during drying and they rehydrate quickly during the cooking/baking process.
I hope you find this recipe helpful and fun, because me and my girls love planning our next recipe combination out.
In the world of busy lives and busy kids, it love knowing that while they are munching down on what to them is a “treat”, to me is a long-carb burning, low fat, heart healthy snack that is totally mobile. (And let me tell you just how yummy these are to warm up in the microwave and have with yogurt….Ahhhhh!)
Thanks for sharing these recipes! They look really good. 🙂
Wow that’s a lot of potatoes. Mine have started to come up in my little patch. I am going to try to grow trash can potatoes again this year. Last year they didn’t do to well.
I hope 75% of them produce! We like potatoes. 🙂
Looks like family fun! I’ve always wanted to plant potatoes and this looks really easy. I don’t need near the potatoes that you need, but I want some. I have a perfect little bed that I could plant them in and maybe have a few potatoes for the fall. Thanks for the tips!
Do you cut your potatoes in 1/2 or how? Thanks so much for the info.!
Hi Jill, Sorry for the delayed response. I focus more on how many eyes are in each piece. Some big potatoes are cut into 3rds or 4ths if they have a lot of good eyes. Some smaller ones are cut in 1/2. Some aren’t cut at all. Pay attention to eyes, and you should be ok! 🙂
I’m a noob when it comes to growing potatoes. I have researched different techniques on how to do it, but have not tried yet since I always lived with roommates with little to no yard. I was just wondering for the future how did the potatoe plants turn out? Do you have other posts or pictures? Did you calculate your results?
Thanks
Jessi
Hi Jessi…I have not harvested all of them, but they are doing great! I’ve probably dug 15 pounds out so far and still have 85% left in the ground. I {think} it was a success, but time will still tell. You can see a picture of my most recent harvest on this post: https://simplifylivelove.com/2013/08/homestead-update-88-building-our-passive-house.html – scroll on down towards the bottom of the post for the picture. I also post a lot of garden pictures on Instagram, if you’re on over there! http://instagram.com/simplifylivelove
Thanks for sharing on Mostly Homemade Mondays! Please join us again tomorrow 🙂
Kelli (www.thesustainablecouple.com)
Hi. Let me get this straight. You dug the row, placed the potatoes, did not cover them with dirt but did cover them with mulch. You also continued coveting them with mulch until they were ready to be harvested? Is this right? I shared a garden area with a few other people this year but I think growing my potatoes (dig, cover with dirt, water, harvest), next to someone else’s hollyhocks really produced a small yield of potatoes. Please let me know if I described your planting method correctly. Anxious to try in next summer. Have a great week. I so love your site!!
Gail
Hi Gail, so I just trench a very shallow hole with my hoe. Then I add the potatoes, cut side down, then I cover them with a little bit of dirt and then a bunch of straw. Keep adding straw as they grow so the potatoes don’t become exposed to the sun as they grow. 🙂 Alternatively, you don’t have to put them in any kind of hole at all. Just throw them right on top of the ground and cover with straw or mulch. 🙂 Good luck!
Hello madam Marine,
I am sayed Hasibullah SHAMS from Afghanistan, I am agriculture professional and earn my bachelor in Agronomy but I would like to add some points for your guide, do not slice potatoes when you are planting them hence if you slice potatoes they will be infecting by germ such as Bacteri, Virus and other daises factors.
All the Best
SHAMS
Mob# 0093772324525
Skype:hasibshams
Namaste’ Michelle ! The Simplify in the site name got picked up by the search engine, and no-dig potatoes ! The Simplify is something I look into, relating to vegan recipes, and the [Essene] Gospel of Peace [of Christ Jesus], Szekely, E.B. ed. [Book One], about some benefits of simple food, not all mixed up. Also, I did just get to plant some reds and some kind of Georgia white potatoes, no dig, It looks like it will grow nicely since I put in some aged wood chip and aged landscaping mulch and free friendly manures !
Also, it is a blessing to have homeschooling back ! Good for you all ! LOVE ALL
I mulched with wood chips, straw bedding from stalls and old hay last year and had several nests of mice living in the potatoes and chewing on the the young growing potatoes under the soil, 🙁 Good luck and I suggest keep cats, 😉
I have concerns as far as how often to water and when is best🥰TIA